It's time for another challenge. This challenge can be done in conjunction with other training programs. It's designed so you can go through this protocol in a very calm and relaxed way. If you do this properly watch your pressing strength go up significantly in just 21 days!
Not everyone is designed to press a bell over head. If you can not lock your elbow and maintain a straight arm over head, chances are, pressing over your head may not be a safe option for you. The majority of my students who are unable to press heavy over head or press anything properly over head, switch to a very LIGHT Bottoms Up carry or Bottoms up press bell. Like with any challenge or new workout regimen make sure you check with your doctor first, proceed with caution and use good judgement. Then have a great time! Details below with video!
DIRECTIONS: Choose a pressing pattern and size bell that works well with your body and your current fitness level. You may use the same size bell each day or use a heavier bell as the reps become lower. For example Day 1 Press 4 times each side with a 12kg bells. Take a 30-120 second rest and use the 12kg bells for 3 times per side. Take a 30-120 second rest and use a 16kg bell for 2 per side and so on. Only go up if you KNOW you can safely get the bell over head WITHOUT a push press.
Rest suggestion: take a minute rest before moving to the next rep range. If you're using a heavier weight than normal take a 2 minute rest. If you need more rest that's ok too! Just get them done within the day!
Note - The 1 rep that is indicated is not meant for you to work with your 1 rep max, You should be able to do 2 consecutive reps with the bell you are using for 1 rep.
The suggest rep are indicated for EACH side.
Day 1 5, 4, 3, 2, 1
Day 2 4, 4, 3, 2, 1
Day 3 4, 3, 3, 3, 2, 1
Day 4 3, 3, 2, 2, 2, 1
Day 5 2, 2, 2, 1, 1, 1
Day 6 1, 1, 1, 1, 1, 1
Day 7 Rest
Day 8 3, 3, 3, 3, 3
Not everyone is designed to press a bell over head. If you can not lock your elbow and maintain a straight arm over head, chances are, pressing over your head may not be a safe option for you. The majority of my students who are unable to press heavy over head or press anything properly over head, switch to a very LIGHT Bottoms Up carry or Bottoms up press bell. Like with any challenge or new workout regimen make sure you check with your doctor first, proceed with caution and use good judgement. Then have a great time! Details below with video!

Pressing options:
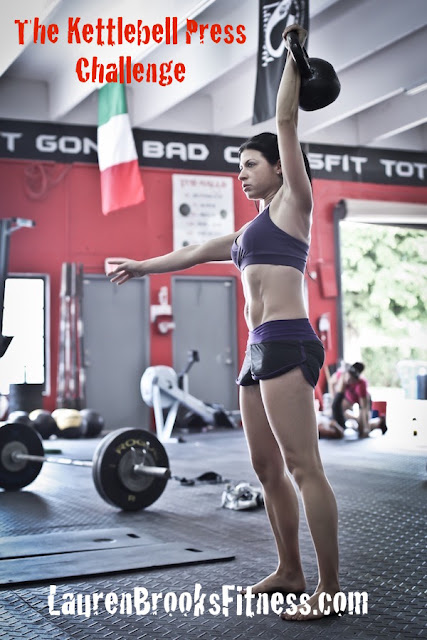
Kettlebell Press
Tall Kneeling Press
Bottoms Up Press
The Kettlebell Press Challenge
(21 days)
#KettlebellPressChallenge #TheKettlebellPressChallenge
DIRECTIONS: Choose a pressing pattern and size bell that works well with your body and your current fitness level. You may use the same size bell each day or use a heavier bell as the reps become lower. For example Day 1 Press 4 times each side with a 12kg bells. Take a 30-120 second rest and use the 12kg bells for 3 times per side. Take a 30-120 second rest and use a 16kg bell for 2 per side and so on. Only go up if you KNOW you can safely get the bell over head WITHOUT a push press.
Rest suggestion: take a minute rest before moving to the next rep range. If you're using a heavier weight than normal take a 2 minute rest. If you need more rest that's ok too! Just get them done within the day!
Note - The 1 rep that is indicated is not meant for you to work with your 1 rep max, You should be able to do 2 consecutive reps with the bell you are using for 1 rep.
The suggest rep are indicated for EACH side.
Day 1 5, 4, 3, 2, 1
Day 2 4, 4, 3, 2, 1
Day 3 4, 3, 3, 3, 2, 1
Day 4 3, 3, 2, 2, 2, 1
Day 5 2, 2, 2, 1, 1, 1
Day 6 1, 1, 1, 1, 1, 1
Day 7 Rest
Day 8 3, 3, 3, 3, 3
Day 9 3, 3, 2, 2, 2
Day 10 3, 2, 2, 2, 1
Day 11 3, 2, 2, 2, 1
Day 12 3, 2, 2, 1, 1
Day 13 3, 2, 1, 1, 1
Day 14 Rest
Day 15 2, 2, 2, 2, 2
Day 16 2, 2, 2, 2, 1, 1
Day 17 2, 2, 2, 1, 1, 1
Day 18 2, 2, 1, 1, 1, 1
Day 19 2, 1, 1, 1, 1, 1
Day 20 Rest
Day 21 Test your 1 REP MAX at the end 2, 1, 1 rep scheme Congratulations!
To check out all of our other past fitness challenges view here.
To join our private facebook group where you can stay motivated and join other people doing the challenges ask to join here.
If you really want to get involved, receive new workouts, videos, recipes monthly check out our exclusive Lauren's Playground.
We encourage a bit of video, photo, or posts of when you participate! No pressure of course! #TheKettlebellPressChallenge #KettlebellPressChallenge


